Showing posts with label traditional. Show all posts

Sunday, July 11, 2010

Cookie #28 - Delaware Peaches

I have to admit, when it came to Delaware I was a bit stuck.  The state drink is milk, but I just couldn't find or come up with a milk cookie that I really liked.  Then I came across this little historical tidbit:  in the 1800's Delaware was the leading producer of peaches in the United States.  Perfect!  A peach cookie!! 
In my search for the ideal peach cookie, I came across a traditional Croatian cookies called breskve These cookies consist of two richly dense cookies sandwiched together with a mixture of cookie crumbs, nuts and peach jam (or Nutella, as you'll see).  When you cut these little beauties in half, they look just like the inside of a peach.
I have to warn you:  these cookies are labor intensive.  I skipped the coloring and sugar step in the recipe I used and I still found them to take a lot of time.  The next time I make them, I'll also have to try to make the balls I rolled smoother so they look more peach like.  Despite the amount of work they took, the flavor was well worth it!  I will definitely be making these cookies again.  I can't wait to experiment with different flavor fillings.  I also will serve them already cut in half, because a whole one can be a little overwhelming - plus I think they are cuter sliced. 
The source for this recipe was a fellow blogger:  Melita at Cafe Chocolada.  Oh my what a beautiful blog.  It is what my small, little blog aspires to be. 
After seeing Melita's breskve, I'm almost embarrassed to post pictures of mine, but that wouldn't be keeping with the point of this blog.  This is a learning experience for me and I promised to share with you everything:  the good, the bad and the ugly. 
I did follow this recipe exactly (with the exception of the coloring and sugaring).  This meant that at 8:30pm, I had to run to Bed, Bath and Beyond to buy a food scale since the ingredient measurements are given in grams.  I'm glad I did because I've used it several times already since buying it.
So here are my breskve, using Cafe Chocolada's recipe here.

Friday, June 18, 2010

Cookie #5 - Jam Thumbprints

I know several people who love these cookies because they remind them of their childhood.  I never had them until I was an adult. 

What I especially love about this cookie is the various flavor combinations you come up with just by changing the jam and nuts.  For this batch I used almonds and raspberry jam.  I'm told this is the traditional flavor.  I started thinking about various other flavors I could use.....my imagination went wild and I had to come back down to Earth so I could concentrate on these.

The cookie I made is a combination of several recipes I've tried over the years.  I've found this makes and excellent base for the jam.  It's not too rich, not too bland.  Not too hard, not too soft.  Yum. 

Jam Thumbprints

1 cup softened butter
1/2 cup granulated sugar
1/2 cup packed light brown sugar
1 egg
3 1/2 cups AP flour
2 teaspoons baking powder
1/2 teaspoon salt
2 tablespoons milk
2 teaspoons vanilla extract

1 egg white, beaten with about 2 tbsp cool water
1/2 cup raspberry jam (or jam of choice)
1 cup crushed almonds (or nut of choice

Beat butter and sugars together until creamy.  Add egg and beat well. Add vanilla.
In another bowl, combine flour, baking powder and salt. 
Add to butter/egg mixture, alternating between milk and flour, always beginning and ending with flour.  Mix on low speed after each addition until well combined.  Chill dough for at least 2 hours.

Preheat oven to 350 degrees.

Roll dough intol 1 1/2 balls.  Roll balls in egg wash and then nuts.  Place on baking sheet. 
Using your thumb, make a depression in the center of each cookie. 

Bake for 10-15 minutes until golden. 

Immediately out of the oven, press the back of your 1/2 Teaspoon measuring spoon into the depression you made with your thumb.  You must do this while the cookies are still warm so they don't crack.  Fill each depression with jam.  Transfer to a wire rack to cook completely. 

I did to about four cookies from this batch with a little Nutella.  Super yum and just what I needed.

Thursday, June 17, 2010

Cookie #4 - Peanut Butter

In high school, our cafeteria had the best peanut butter cookies ever. They were extra peanut buttery and crumbly. They stuck to your palate making your mouth beg for cold milk.

A few years ago, my best friend gifted me with THE recipe (she has school district connections). Of course, the recipe makes about a hundred cookies. So, after quartering the recipe I tried them out. They just weren't the same. I tried and tried again, but I could never replicate the awesomeness..

So, when I knew that peanut butter cookies would be included in week one of this project, I was eager to retry the recipe.

That was until I lost it.

Somewhere between a wedding, three moves and two babies, my beloved cookie recipe disappeared. So, I consulted my trusty Joy of Cooking. While not the creamy, crumbly cookie of my high school days, they still came out pretty darn good. They do need more peanut butter, though. I think perhaps next time I'll increase the peanut butter and decrease the actual butter. I realize now, after researching various peanut butter cookie recipes that the cookie of my youth probably had little to no flour at all. I've come across a few recipes like that and perhaps I'll have to try one out in the course of this experiment.

This was also my first cookie error of the experiment. I know better and I ignored my baker's instinct.

My kitchen was insufferably hot the day I made these and I neglected to chill the dough before baking. This, of course, caused my cookies to spread to about the size of my hand making the famous crisscross marks almost nonexistent. They were still pretty tasty.

Peanut Butter Cookies (The Joy of Cooking, 1984 edition)

1/2 cup butter or shortening (I used butter)
1/2 cup packed brown sugar
1/2 cup granulated sugar
1 egg
1 cup butter
1/2 teaspoon salt
1/2 teaspoon baking soda
1/2 teaspoon vanilla
1 - 1 1/2 cups flour (sift before measuring)

Preheat oven to 375 degrees.
Beat butter until soft. Add sugars gradually and beat until creamy. Beat in egg, salt, baking soda, and vanilla.
Gradually add flour.
Roll the dough into small balls and placed hem on a parchment lined cookie sheet.
Press flat with a fork to form cross hatches. Bake for 10-12 minutes until they just start to change color.

Wednesday, June 16, 2010

Cookie #3 - Sugar Cookies

Today would have been my father's 90th birthday.  He was well into his fifties when I was born and passed away almost 14 years ago.  I miss him terribly every day.  Since his favorite cookie that I made for him was sugar, I couldn't think of a better way to celebrate his birthday.

These are my go-to cookie. I make them for everything - birthdays, holidays, Wednesdays....

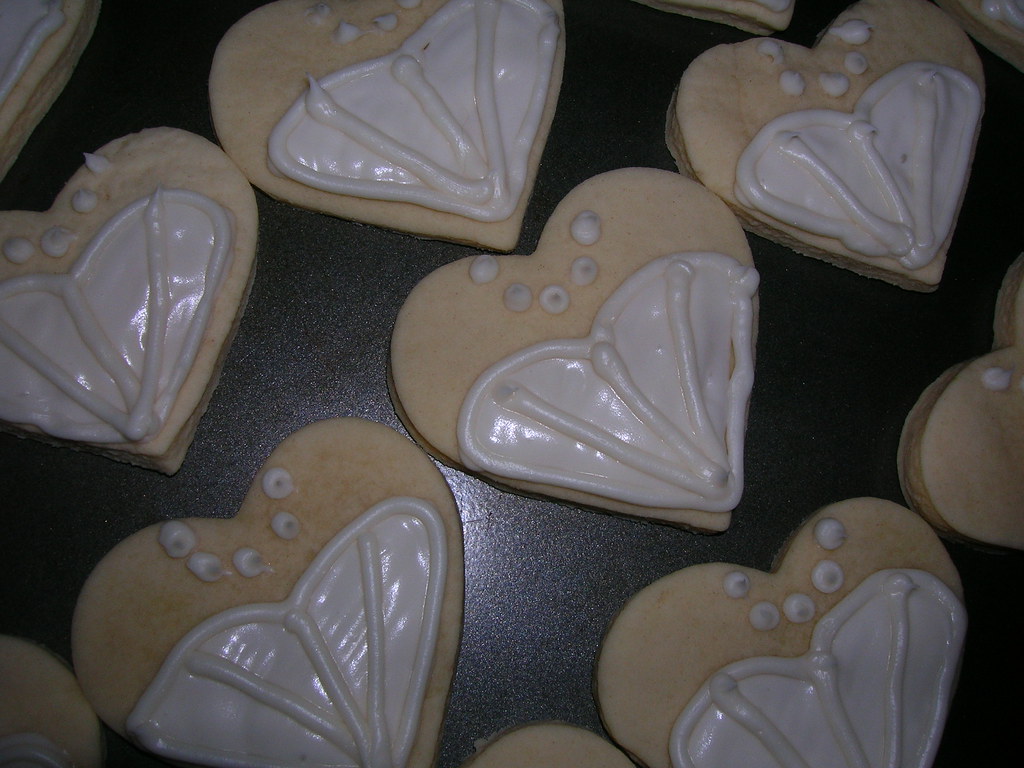
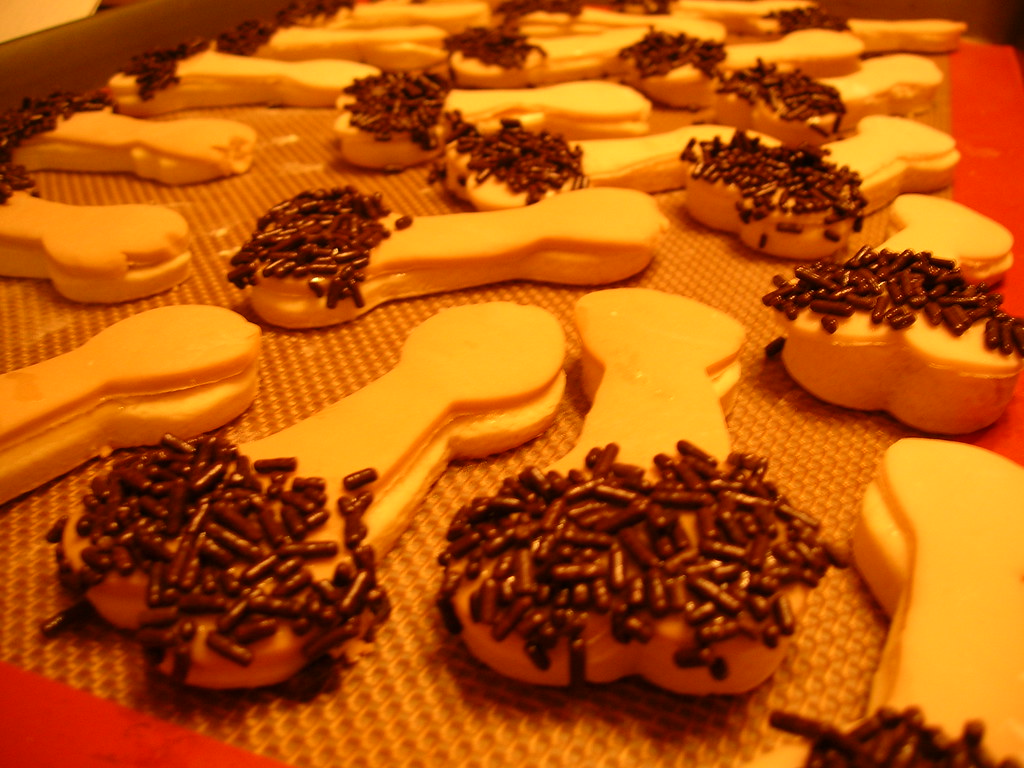
Normally, I roll them and cut them out. Then they're frosted with royal icing or cut out fondant. I"ve made them in a number of different shapes - flowers, apples, baby feet, Pac-Man, music notes, wedding dresses, the state of Ohio, Devo hats (don't ask), and even a certain part of the male anatomy for a friend's bachelorette party. 
This time, I decided to just slice and bake with some simple colored sugar on top. I wanted to keep them pure and let the full flavor of the cookie come through. Often times, the frosting can overpower that warm, toasty, vanilla cookie flavor. I realize that now that I've made them this simplistic way.
The recipe I use is, again, from The Joy of Cooking. It is by far the best sugar cookie recipe I've encountered. Super easy, super quick and super yummy. The cookie trifecta.

Roll Cookies (Joy of Cooking, 1984 edition)

1/2 cup white or brown sugar (I use white)
1/2 cup butter
1 teaspoon vanilla
2 eggs
2 1/2 cups sifted all-purpose flour
2 teaspoons double acting baking powder
1/2 teaspoon salt.

Beat sugar and butter together until creamy.
Beat in vanilla, eggs, flour, bakinkg powder and salt.
Chill the dough for at lease 3-4 hours before rolling.

For this batch, I formed the dough into a log before chilling and then simply sliced and baked them.  I sliced them almost 1/4" thick.  The result was a soft, cakey cookie. 
Preheat the oven to 375 degrees.
When rolling to dough out, use as little flour as possible. Try not to handle the dough too much as it can make the cookies tough.
Bake the cookies for 7-12 minutes.

Tuesday, June 15, 2010

Cookie #2 - Oatmeal Raisin

I've managed to convince myself that if a cookie has something healthy in it (i.e., oatmeal) that you can eat it for breakfast.  Bring on the oatmeal raisin cookie. 
The nutty oatmeal, spicy cinnamon, chewy raisins and sweet brown sugar meld together and remind me of snowy winter afternoons.  Exactly what I needed to beat the heat and humidity of June.  In hindsight, maybe I should've saved this cookie for a hot August day. 
I used the recipe I've always used - right off the Quaker Oatmeal canister.  They're affectionatley called "Vanishing Oatmeal Raisin Cookies." 

Vanishing Oatmeal Raisin Cookies from Quaker Oats

1/2 cup (1 stick) plus 6 tablespoons butter, softened
3/4 cup firmly packed brown sugar
1/2 cup granulated sugar
2 eggs
1 teaspoon vanilla
1-1/2 cups all-purpose flour
1 teaspoon baking soda
1 teaspoon ground cinnamon
1/2 teaspoon salt (optional)
3 cups Quaker® Oats (quick or old fashioned, uncooked)
1 cup raisins
Heat oven to 350°F. In large bowl, beat butter and sugars on medium speed of electric mixer until creamy. Add eggs and vanilla; beat well. Add combined flour, baking soda, cinnamon and salt; mix well. Add oats and raisins; mix well.
Drop dough by rounded tablespoonfuls onto ungreased cookie sheets.
Bake 8 to 10 minutes or until light golden brown. Cool 1 minute on cookie sheets; remove to wire rack. Cool completely. Store tightly covered.

Monday, June 14, 2010

Cookie #1 - Nestle Tollhouse Chocolate Chip Cookies


These were the very first cookies I ever learned how to make. 
These were the very first cookies I ever taught someone how to make.  (I remember helping everyone in my junior hight Home-Ec class)
They are the type of cookie that just envokes this feeling of home and comfort.  There's something about eating one right out of the oven or dunking them in a cold glass of milk. 
ANYONE can make these - and no, I don't mean just opening up a tube and plopping them on a cookie sheet (though this was my preferred method when I was pregnant with my first daughter).  I mean honest to goodness make them from scratch.  No expensive, hard to get ingredients.  Chances are, if you cook at all, you already have the ingredients in your pantry and fridge. 
The best part is you can bake this one recipe a few different ways:  as cookies, as a cookie cake or as a bar cookie.  All you do is vary the pan and cooking time. 

So, I thought this classic cookie would be the ideal first cookie for this project.  With a little help from Sydney, I mixed together the ingredients and soon my kitchen was filled with the smell of fresh baked cookies.  They were as good as I remember.

Tollhouse Chocolate Chip Cookies

2 1/4 cups all-purpose flour
1 teaspoon baking soda
1 teaspoon salt
1 cup butter or margarine, softened
3/4 cup granulated sugar
3/4 cup packed brown sugar
1 teaspoon vanilla extract
2 large eggs
1 (12 ounce) package NESTLE® TOLL HOUSE® Semi-Sweet Chocolate Morsels
1 cup chopped nuts (these are optional and I chose to omit them)

PREHEAT oven to 375 degrees F.


COMBINE flour, baking soda and salt in small bowl. Beat butter, granulated sugar, brown sugar and vanilla extract in large mixer bowl until creamy. Add eggs one at a time, beating well after each addition. Gradually beat in flour mixture. Stir in morsels and nuts. Drop by rounded tablespoon onto ungreased baking sheets.

BAKE for 9 to 11 minutes or until golden brown. Cool on baking sheets for 2 minutes; remove to wire racks to cool completely.